

Driving a screw straight might seem like a simple task, but it can be quite challenging, especially for those who are new to DIY projects or professional carpentry work. A crooked screw not only looks unprofessional but can also compromise the integrity of the joint or connection. As a screw supplier, I understand the importance of using the right screws and the proper techniques to ensure that every installation is successful. In this blog, I'll share some tips and tricks on how to drive a screw straight, along with recommendations for the right screws for different applications.
Understanding the Basics of Screwdriving
Before we delve into the techniques, it's essential to understand the basic components of a screw and the screwdriving process. A screw consists of a head, a shank, and a thread. The head is the top part of the screw, which is designed to be turned by a screwdriver or a power drill. The shank is the smooth part of the screw between the head and the thread, and the thread is the spiral part that grips the material.
When driving a screw, the goal is to create a secure connection by turning the screw into the material until it is fully seated. To do this, you need to apply the right amount of torque, or rotational force, to the screw. Too much torque can strip the thread, while too little torque can result in a loose connection.

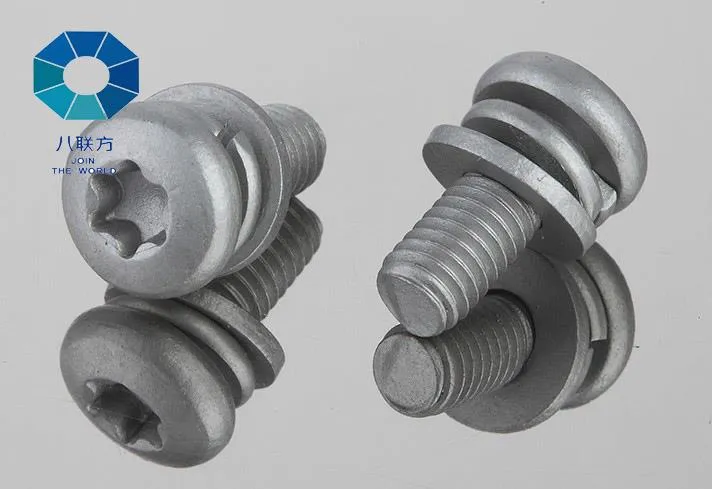
Choosing the Right Screw
The first step in driving a screw straight is to choose the right screw for the job. Different screws are designed for different materials and applications. For example, wood screws are designed to be used in wood, while machine screws are used in metal and plastic. Here are some of the screws we offer at our store:
- Dacromet Plated Torx Pan Head Sems Screw: These screws are made of alloy steel and are coated with Dacromet for excellent corrosion resistance. The Torx pan head provides a secure grip, making them ideal for use in automotive and industrial applications.
- Galvanized Knurled Shoulder Thumb Screw: Galvanized for corrosion protection, these thumb screws have a knurled shoulder for easy hand tightening. They are commonly used in machinery and equipment where frequent adjustments are required.
- Inch Iron Zinc Plated Drywall Screws Black Drywall Screws: These drywall screws are made of iron and are zinc-plated for corrosion resistance. They are designed to be used in drywall installation and provide a strong and secure connection.
Preparing the Work Surface
Once you have chosen the right screw, the next step is to prepare the work surface. This involves marking the location where the screw will be inserted and drilling a pilot hole if necessary.
- Marking the Location: Use a pencil or a marker to mark the exact location where the screw will be inserted. This will help you align the screw correctly and prevent it from going in at an angle.
- Drilling a Pilot Hole: For hard materials such as metal or hardwood, it is often necessary to drill a pilot hole before inserting the screw. A pilot hole helps to prevent the screw from splitting the material and makes it easier to drive the screw straight. The size of the pilot hole should be slightly smaller than the diameter of the screw.
Using the Right Tools
Using the right tools is crucial for driving a screw straight. Here are some of the tools you will need:
- Screwdriver or Power Drill: Depending on the type of screw and the material you are working with, you can use either a screwdriver or a power drill. A power drill is faster and more efficient, especially for large projects, but a screwdriver gives you more control and is better for delicate work.
- Bit: Make sure you use the correct bit for the type of screw you are using. Using the wrong bit can cause the screw to slip or strip the head.
- Clamps or Vise: If you are working with a small or delicate piece of material, you may want to use clamps or a vise to hold it in place. This will prevent the material from moving while you are driving the screw and help you keep the screw straight.
Techniques for Driving a Screw Straight
Now that you have chosen the right screw, prepared the work surface, and gathered the necessary tools, it's time to start driving the screw. Here are some techniques to help you drive a screw straight:
- Start at a 90-Degree Angle: Hold the screwdriver or drill perpendicular to the work surface. This will help you keep the screw straight from the start.
- Apply Steady Pressure: As you start to turn the screw, apply steady pressure downwards. This will help the screw bite into the material and prevent it from going in at an angle.
- Use a Guide: If you are having trouble keeping the screw straight, you can use a guide. A guide can be a piece of wood or metal with a hole drilled in it that is the same size as the screw. Place the guide over the marked location and insert the screw through the hole. This will help you keep the screw straight as you drive it in.
- Check Your Progress: As you drive the screw in, periodically check to make sure it is going in straight. If you notice that the screw is starting to go in at an angle, stop and correct it. You can use a pair of pliers to gently straighten the screw if it is only slightly off.
Troubleshooting Common Problems
Even if you follow all the tips and techniques, you may still encounter some problems when driving a screw straight. Here are some common problems and how to fix them:
- Screw Stripping: If the screw starts to strip, it means that the torque is too high or the bit is not the correct size. Stop immediately and remove the screw. Try using a smaller bit or applying less torque.
- Screw Going in at an Angle: If the screw starts to go in at an angle, stop and try to straighten it. You can use a pair of pliers to gently turn the screw back to the correct angle. If the screw is already too far in, you may need to remove it and start over.
- Screw Not Going in: If the screw is not going in, it may be because the pilot hole is too small or the material is too hard. Try drilling a larger pilot hole or using a different type of screw.
Conclusion
Driving a screw straight is an essential skill for anyone who works with screws. By choosing the right screw, preparing the work surface, using the right tools, and following the correct techniques, you can ensure that every screw you drive is straight and secure. As a screw supplier, we offer a wide range of high-quality screws for different applications. If you have any questions or need help choosing the right screw for your project, please feel free to contact us. We are always happy to help you find the perfect solution for your needs.
References
- "Screw Basics: Understanding the Different Types and Uses." DIY Network.
- "How to Drive a Screw Straight." Family Handyman.
- "Tips for Driving Screws Like a Pro." This Old House.