How do I replace a broken screw?
Screws are ubiquitous in our daily lives, holding together everything from furniture and electronics to machinery and vehicles. However, they can break due to various reasons such as over - tightening, corrosion, or excessive stress. As a screw supplier, I often receive inquiries from customers on how to replace a broken screw. In this blog post, I'll guide you through the process step by step.
1. Identify the Broken Screw
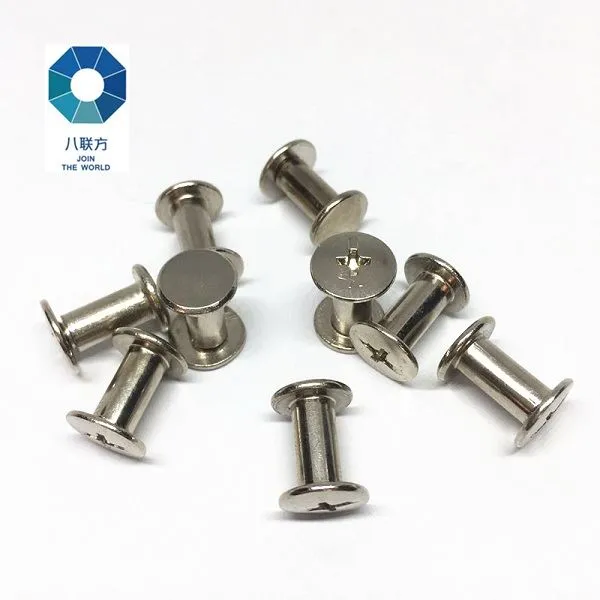
The first step is to accurately identify the broken screw. You need to know its type, size, and thread pitch. Different applications require different types of screws. For example, in office furniture, you might commonly find Standard M5 Chicago Screw. They are known for their ease of installation and removal, making them ideal for items that need to be assembled and disassembled frequently.
In machinery, Hexagon Socket Button Head Screw is a popular choice. These screws offer a low - profile design and are tightened using an Allen key, providing a more secure fit in high - stress applications.
For electronics, Phillip Flat Head Machine Screw is often used. The flat head allows the screw to sit flush with the surface, which is crucial for the aesthetics and functionality of electronic devices.
To determine the size of the screw, you can use a caliper to measure the diameter of the screw shaft. The thread pitch, which is the distance between adjacent threads, can be measured using a thread pitch gauge. This information is vital as you'll need to find a replacement screw that matches these specifications precisely.
2. Gather the Necessary Tools
Once you've identified the broken screw, it's time to gather the tools required for the replacement. The basic tools you'll need include:
- Screwdrivers: Depending on the type of screw head, you'll need the appropriate screwdriver. For Phillips - head screws, a Phillips screwdriver; for flat - head screws, a flat - blade screwdriver; and for hex - head screws, an Allen key.
- Pliers: Pliers can be useful for gripping and removing the broken part of the screw if it's protruding.
- Drill and Drill Bits: In some cases, when the screw is completely broken off and cannot be removed by other means, you may need to drill out the broken screw. You'll need a drill bit that is slightly smaller than the diameter of the screw.
- Replacement Screw: As mentioned earlier, make sure the replacement screw matches the type, size, and thread pitch of the broken one.
3. Remove the Broken Screw
There are several methods to remove a broken screw, and the method you choose depends on the situation.
If the Screw Head is Intact but Stripped
- If the screw head is stripped, you can try using a rubber band. Place a wide rubber band over the stripped screw head and press down firmly with the appropriate screwdriver. The rubber band can provide extra grip and help you turn the screw.
- Another option is to use a screw extractor. A screw extractor is a tool designed specifically for removing stripped or broken screws. First, drill a small hole in the center of the screw using a drill bit that is recommended for the extractor. Then, insert the extractor into the hole and turn it counter - clockwise to remove the screw.
If the Screw is Broken Off and Protruding

- If a part of the screw is protruding, you can use pliers to grip the broken part and turn it counter - clockwise to remove it. Make sure to grip the screw firmly to avoid slipping and causing further damage.
If the Screw is Broken Off and Flush with the Surface
- This is the most challenging situation. You'll need to drill out the broken screw. First, select a drill bit that is slightly smaller than the diameter of the screw. Mark the center of the broken screw precisely and start drilling slowly. As you drill, be careful not to drill too deep and damage the surrounding material. Once you've drilled through the screw, you can use a tap to re - thread the hole if necessary.
4. Install the Replacement Screw
After successfully removing the broken screw, it's time to install the replacement screw.
- First, clean the hole to remove any debris or metal shavings left from the removal process.
- Apply a small amount of lubricant to the threads of the replacement screw. This can make the installation process smoother and prevent the screw from seizing in the future.
- Insert the replacement screw into the hole and start turning it clockwise using the appropriate screwdriver. Make sure to turn the screw slowly and evenly to avoid cross - threading. Cross - threading occurs when the screw threads do not align properly with the threads in the hole, which can damage both the screw and the hole.
- Tighten the screw to the appropriate torque. Over - tightening can cause the screw to break again, while under - tightening can result in a loose connection.
5. Test the Connection
Once the replacement screw is installed, test the connection to ensure it is secure. If it's a piece of furniture, try moving or using the furniture to see if the screw holds up. If it's an electronic device, power it on and check if it functions properly.
As a screw supplier, we understand the importance of having high - quality screws for your projects. We offer a wide range of screws, including the Standard M5 Chicago Screw, Hexagon Socket Button Head Screw, and Phillip Flat Head Machine Screw. If you have any questions about screw selection, replacement, or need to place an order, please feel free to contact us for procurement and negotiation. We are committed to providing you with the best products and services.
References
- "Screw Handbook" - A comprehensive guide on screws, their types, and applications.
- "DIY Home Repairs" - A magazine that provides practical tips on various home repair tasks, including screw replacement.